

The AndyPi (Meme) Coin! Full guide to creating your own cryptocurrency token on the Solana blockchain This guide is based on the excellent video by Network Chuck (https://youtu.be/L4ASwqLZVV0?t=397). I’ve documented actually minting a real token with real money, and clarified… Continue Reading →

For each python app I build, the server deployment always seems to be the most difficult part! As well as Python we need some kind of python server (uWSGI) and a web server AND getting the SSL certs…. I guess… Continue Reading →

1. Automate the boring stuff… A client needed to send short email every day with pre-prepared content to a list of people in google contacts who have a specific label. At the moment, they are doing this by creating and… Continue Reading →

Git Cheat Sheet – Intermediate This article gives a handful of intermediate level git commands and how to use them, following on from my basic git cheat sheet. They help with the following scenarios: 1. Git config better default settings… Continue Reading →

I set myself a challenge this year to try out a new programming language, and this is a write up of how I got on with ‘go’, outlining the installation process, basic coding and then packaging the program for end… Continue Reading →
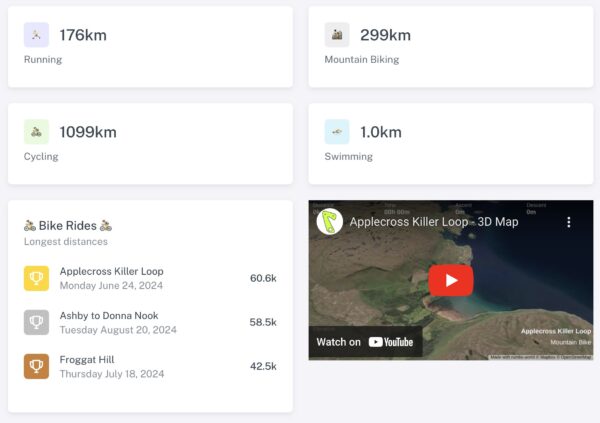
During the past few months I’ve started to track my biking and running on Strava, partly because I’m training for some events, and partly just for fun – coding fun – now I have some interesting data to visualize! strava.andypi.co.uk… Continue Reading →
Here’s a list of interesting blogs or useful posts from the design, business or leadership side of software engineering. The cover a range of topics but I’m specifically excluded detailed coding tutorials. I’ve most found these from Y Combinator’s Hacker… Continue Reading →
For my latest web app I’m using Django allauth, a plugin which allows you to easily add loads of different providers (Google, Microsoft, Apple – and more than 100 others at current count) to authenticate users. It saves a lot… Continue Reading →

To setup the mAP lite as a wifi client and provide network access to a device connected to the ethernet port, I followed these steps

I created my own concise quick reference guide / cheat sheet for debugging anything. The free PDF guide has ten steps, and each step has a simple Python example to illustrate it, and there’s a space to write notes about the system or bug you are currently working on. It’s based on David Agan’s ‘Debugging: The 9 Indispensable Rules for Finding Even the Most Elusive Software and Hardware Problems’.
© 2025 AndyPi — Powered by WordPress
Theme by Anders Noren — Up ↑