
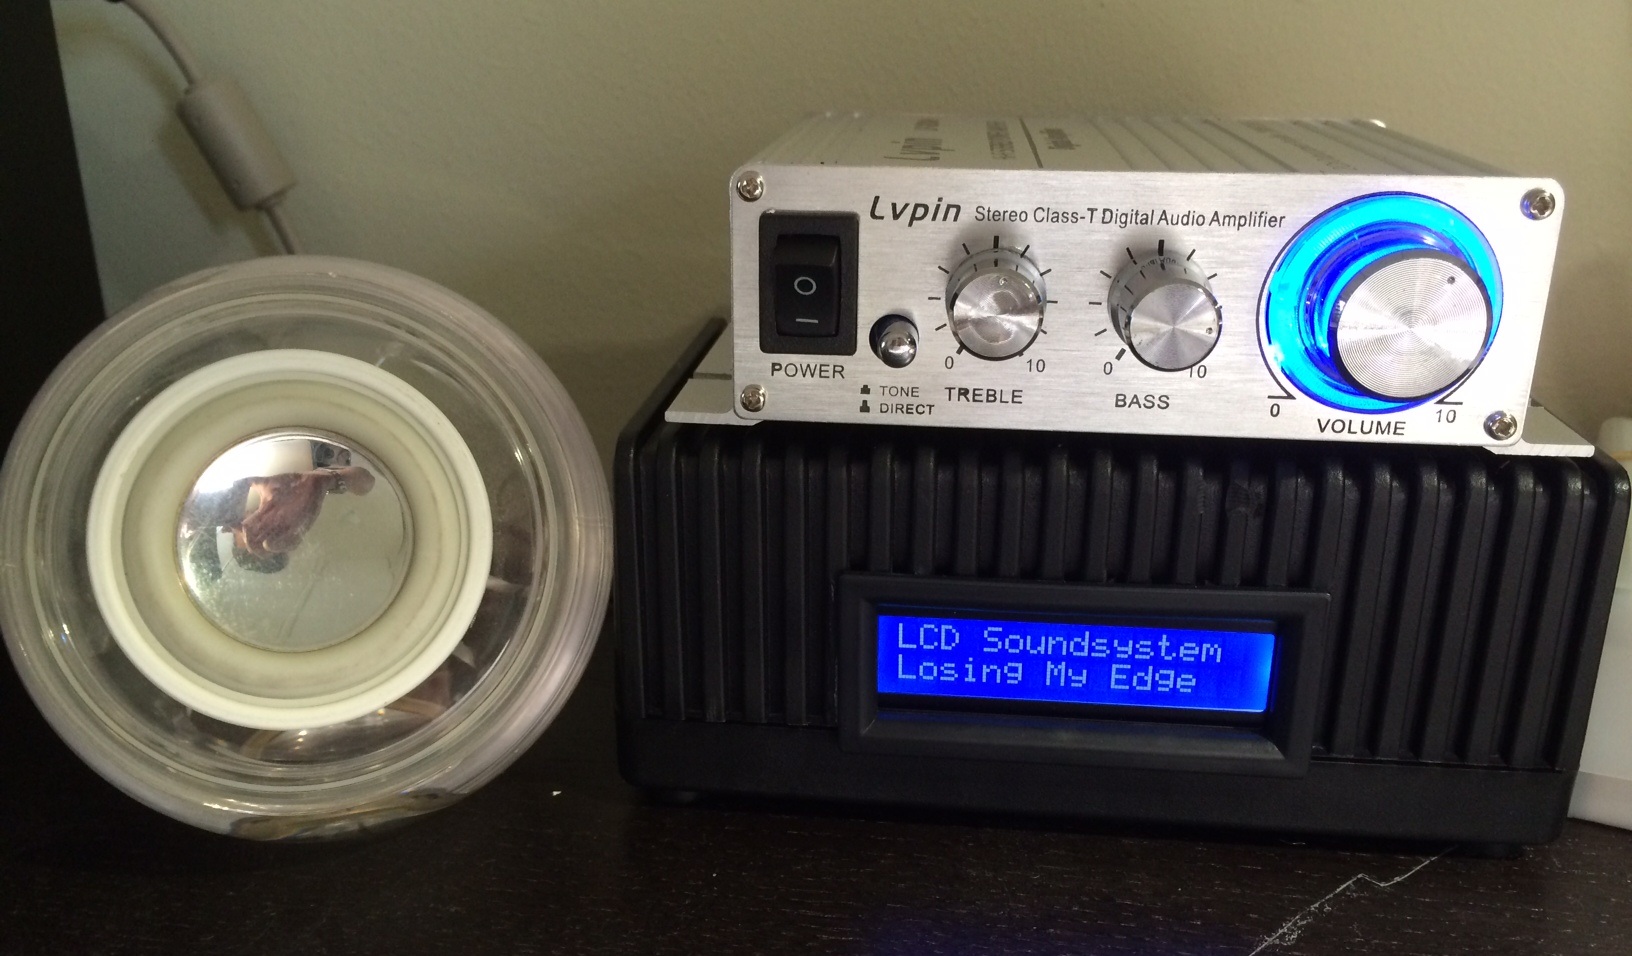
AndyPi LCDs also work really well with Volumio (formely called RaspyFi). This distribution has been optimised for playing high quality audio (often through a usb DAC device hooked up to some high quality speakers). You can control it via any web enabled device, through your browser or an iOS or Android app. The above photo shows one of AndyPi’s customer’s volumio setup.
(Note – this can’t stream audio TO other devices, use RASPBMC for that!)
Instructions to set-up AndyPi LCD (Using Volumio v1.55 – updated 06 April 2015)
[First plug in the AndyPi LCD into the Raspberry Pi GPIO ports using same wiring configuration as for the other distributions (see step 2 here), except I’m assuming most people are wanting to use with with HifiBerry, in which case attach LCD pin A (LCD Anode) to Raspberry Pi GPIO17 (pin 11).Other HD44780 LCDs should work as long as you use the same wiring.]

1. Log in (using a screen and keyboard or vis SSH) and update the Raspbian software repositories, since the RaspyFi has cleaned the cache out to save space. It will take a few minutes.
sudo apt-get update
2. Install and manually configure the LCDproc server (software that operates the LCD), including the correct Raspberry Pi drivers, and updated configuration file for the AndyPi LCD wiring.
sudo apt-get install lcdproc
Tou’ll first get a long message about php5, just tap q to quit. On the next screen, to the question perfrm automatic configuration upgrade, click yes, and it will then take a few minutes to install some packages. On the next screen: choose “keep the local version currently installed”. There will then be two other questions, answer default N for both. Finally you’ll be presented with a screen similar to the first one. Again choose “keep the local version currently installed”. Lcdproc will then finish installing.
3. Raspberry Pi 2 only (not tested on pi 2 yet)
There are some internal hardware changes in the raspberry pi 2. The current lcdproc software is not yet up to date, so you’ll need to change over one file (make a copy first just in case). See these pages for details – http://www.raspberrypi.org/forums/viewtopic.php?f=44&t=100066&p=723632&hilit=lcdproc+raspberry+2#p723632 and http://ehc.ac/p/lcdproc/patches/21/#b8f3)
sudo cp /usr/lib/arm-linux-gnueabihf/lcdproc/hd44780.so /usr/lib/arm-linux-gnueabihf/lcdproc/hd44780.so.bak
sudo rm /usr/lib/arm-linux-gnueabihf/lcdproc/hd44780.so
wget -O /usr/lib/arm-linux-gnueabihf/lcdproc/hd44780.so hd44780 http://download.andypi.co.uk/hd44780.so
4. Add additional drivers for the pi and install the configuration file.
cd /home/pi
mkdir /home/pi/lcdproc
cd lcdproc
wget -O /home/pi/lcdproc/raspidrivers.tar.gz http://download.andypi.co.uk/raspdrivers.tar.gz
tar xzvf raspidrivers.tar.gz
cp /etc/LCDd.conf /etc/LCDd.old
rm /etc/LCDd.conf
wget -O /etc/LCDd.conf http://download.andypi.co.uk/LCDd-VOLUMIO.conf
5. Install mpdlcd, and download the config file. (mpd = music player daemon, this piece of software takes information from the mpd and presents it to lcdproc to display on the LCD)
sudo apt-get install python-mpd
sudo apt-get install python-pip
sudo pip install mpdlcd
wget -O /etc/mpdlcd.conf http://download.andypi.co.uk/mpdlcd.conf
6. UPDATE 25/11/2015: You’ll want to get LCDd and mpdlcd to auto start when you boot the pi. One of our readers has an updated method of how to do this:
sudo nano /etc/init.d/mpdlcd
#! /bin/sh
case "$1" in
    start)
        /usr/local/bin/mpdlcd --no-syslog &
        ;;
    stop)
        killall mpdlcd
        ;;
    *)
        echo "Usage: /etc/init.d/mpdlcd {start|stop}"
        exit 1
        ;;
esac
exit 0
#
sudo chmod a+x /etc/init.d/mpdlcd
sudo update-rc.d mpdlcd defaults
sudo update-rc.d LCDd defaults
6. Add LCDd and mpdlcd to run on startup (mpdlcd needs doing manually, so open /etc/bootmisc.sh in text editor nano, and add a line for mpdlcd as shown below)
sudo update-rc.d LCDd defaults
sudo nano /etc/init.d/bootmisc.sh
add the following line at the end of the file, on the line BEFORE the last colon:
su pi -c “mpdlcd – – no-syslog &”
(note, that’s two SINGLE dashes before no-syslog, WITHOUT spaces, DO NOT COPY AND PASTE THIS DIRECTLY AS YOU WILL ONLY GET A LONG SINGLE DASH!)
Press Ctrl-X to exit, and press Y and Enter to save
(note: the “&” after the command makes it run in the background, and for some reason the program crashes unless you disable the syslog. Not sure why at this stage. If you have problems only seeing the LCDproc server, then can always start mpdlcd from the console like this: sudo mpdlcd –no-syslog &; if it works, it’s likely you’ve got an issue with bootmisc.sh – you can download a working version from here)
7. Finally, reboot the system (sudo shutdown -r now), and when it has restarted you should have a blank LCD screen lit up. Start playing something with Volumio and you’ll see it displayed!
8. Tweaking. If you want to change what is displayed on the LCD (i.e. remove the time elapsed, put the artist on the bottom line and song title on the top, etc), you’ll need to open the config file to play around. Since this is a 2-line display, we’ll need to change pattern2. You’ll see some other display options in the other patterns, the syntax is pretty straightforward so just play around!
sudo nano /etc/mpdlcd.conf
standard pattern for you to edit:
pattern2 = {song format=”%(artist)s”,speed=4} {elapsed}
{song format=”%(title)s”,speed=2} {state}
9. Troubleshooting – There is a known issue with mpdlcd crashing when playing certain files – these have been identified as those whose ID3 tags have been edited with JRiver and have extra, non-standard / duplicated tags. If mpdlcd crashes but the rest of the system is working – use a different editor to clean up your tags.