
A few weeks ago I wrote an Ansible module for Fly. To give you some background, Fly is an application delivery network which I mainly use for auto provisioning SSL certificates for static websites, and Ansible is an open source automation tool written in Python.
I’ve used open source software many times before but this is the first time I’ve actually contributed to a project. It was well worth doing not only to add functionality for other Ansible users but it also taught me some ways to improve my coding and how to collaborate with others. Here’s a run down of the process.
Step 1. Fork the code from Github
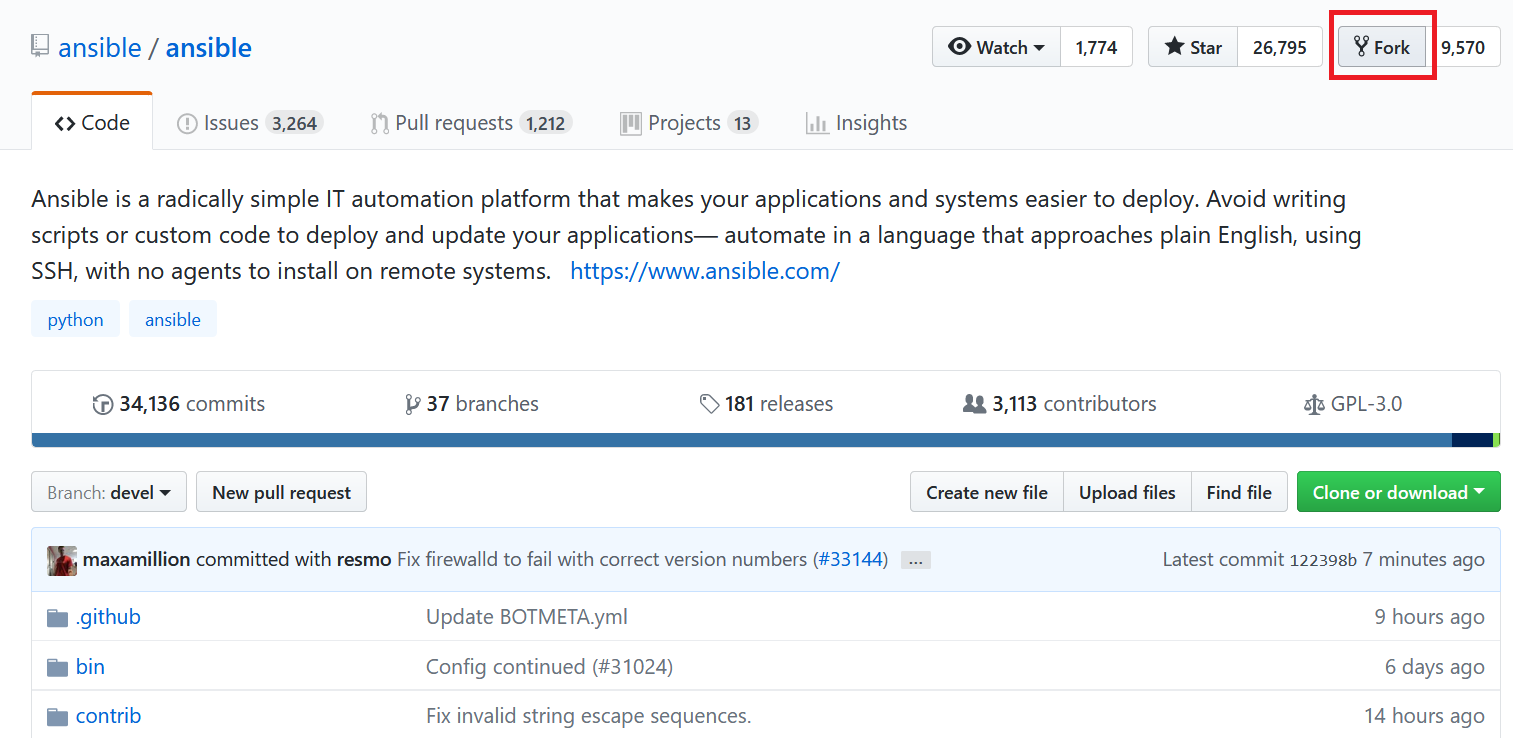
Most open source projects require you to know how to use the git version control software to be able to contribute. Git is not the most intiutive software but I found Codecademy’s online course a great starting place to practice, and now I just refer back to my own crib sheet for reference. Ansible is based on Github, so you’ll need a github account too, and then you’ll need to fork the Ansible repo. In laymans terms, forking means you copy the entire code from the original user into your own repo which you can modify.
Sign in to your github account, go to the ansible repo, and click ‘fork’.
Now from your own fork you can choose clone, and grab the link to your own repo.

Now you can clone the repo onto your local machine:
git clone https://github.com/<YOUR-GITHUB-USER-NAME>/ansible.git
Step 2. Write your code
Now its time to start coding. In this case, Ansible has its own module ‘boilerplate’ code which you can use as a starting point. This helped a lot for me – as did looking at the code for other similar modules to get an idea of how they worked. I just added a single python file in the ansible/lib/ansible/modules/net_tools folder.
Step 3. Create a pull request
When you’ve finished coding and tested it on your local machine the next step is to create a pull request – basically asking the maintainer of the original repo to accept your changes and merge them into their repo. To do this we first need to add and commit our changes to our copy of the repo:
git add .
git commit -m "add new ansible module"
git push
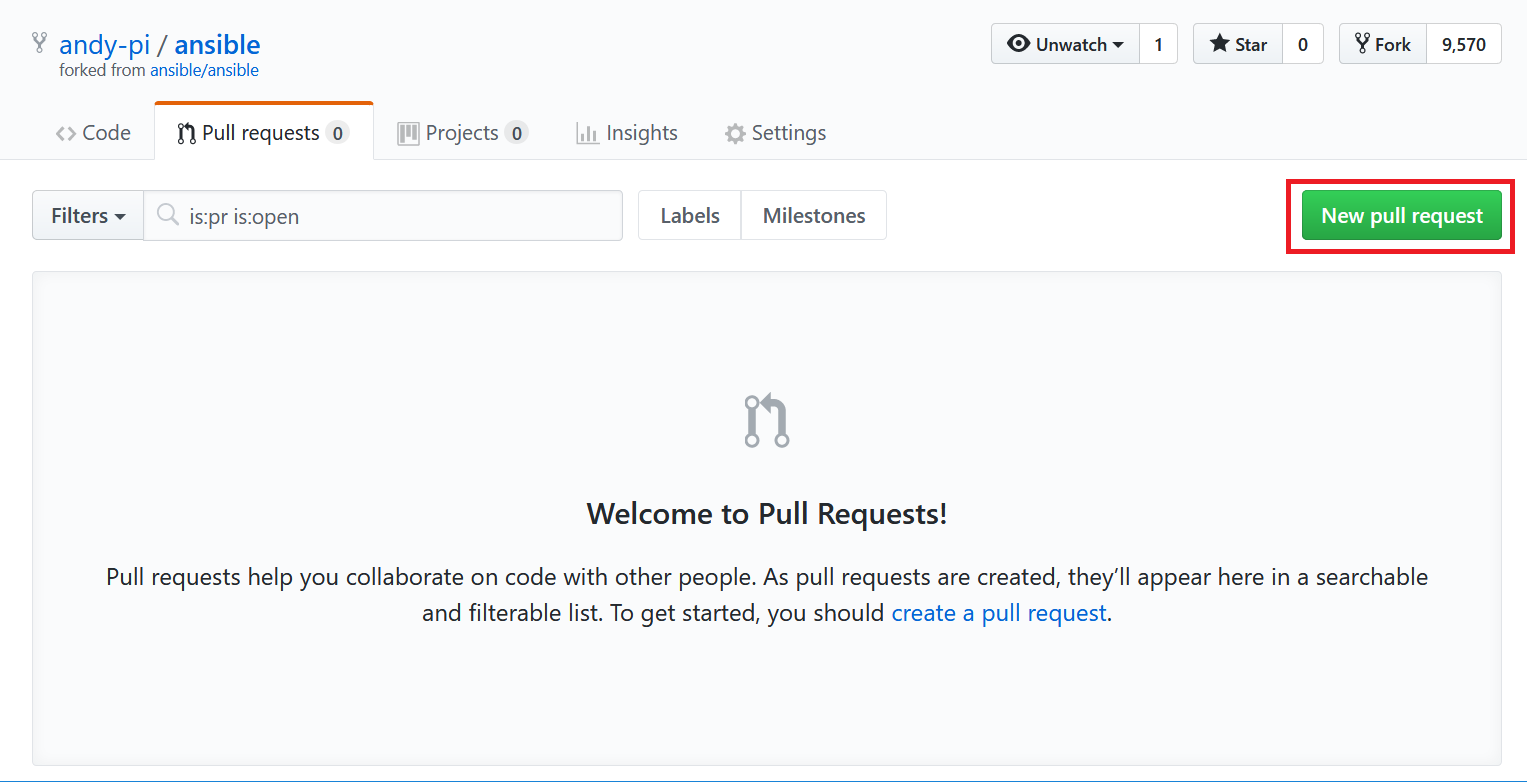
Then from your own fork of the repo, go to the pull requests, and click ‘new pull request’.
The Ansible project maintainers request that you make a comment to explain the pull request using the following template. I think this is good practice – but check out the requirements for the particular project you are contributing to as it is likely to be a bit different.
Step 4. Review and correct errors
As soon as you submit the pull request, Ansible have a github bot which will check your code for errors. It will take a few minutes to run, and then it will leave a comment showing whether the test passed or not and the output of any errors, for example:
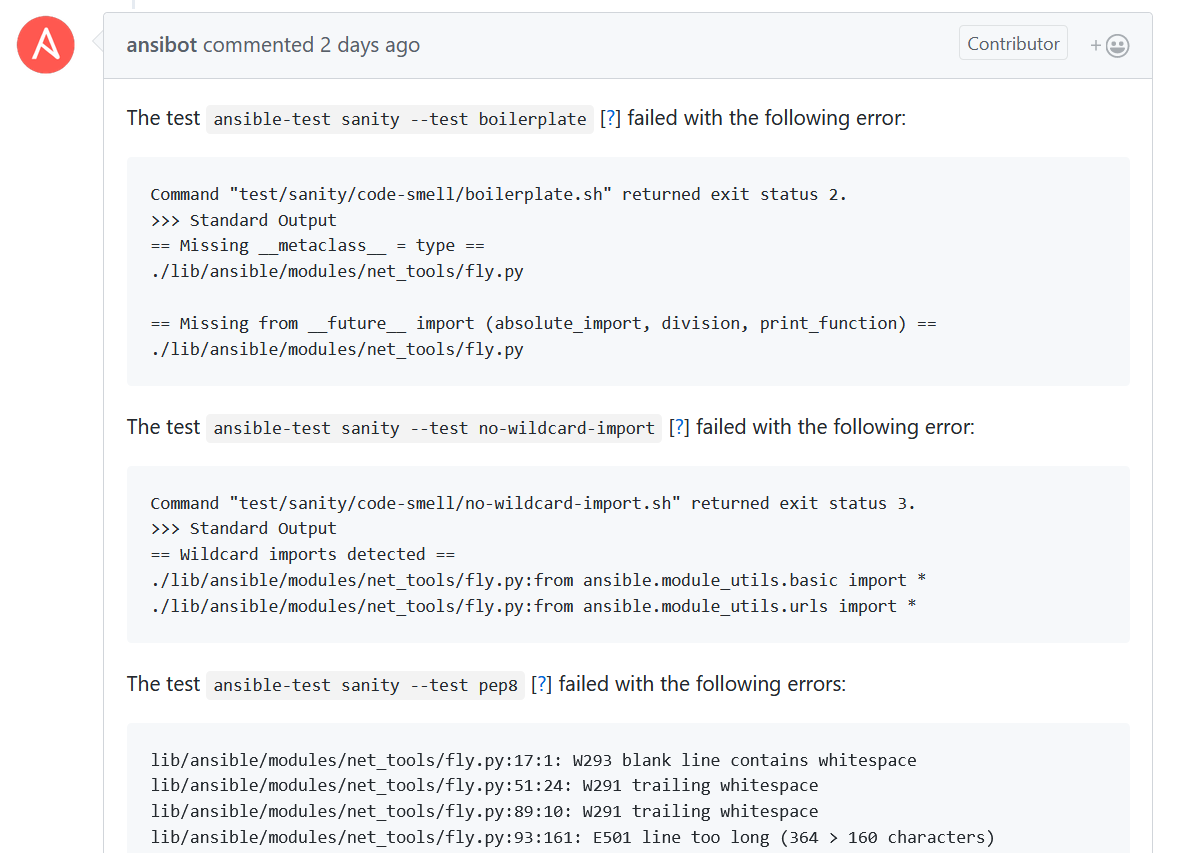
From this output we can see that Ansible don’t want wildcard imports of a module with *, and I’ve also missed out a couple of lines which should be there according to their boilerplate. Finally I also had millions of ‘trailing whitespace’, ‘missing whitespace’ kind of errors, which although is valid python code, it doesn’t conform to the stricter PEP8 definition which aims to standardise how python is written for ease of reading.
The great thing about the bot is that these checks are all automatic, and saves review time on style or syntax errors which can be picked up and fixed in advance of a human review. I discovered that you can actually run these tests locally too, e.g.
ansible-test sanity --test pep8
. That’s obviously just for Ansible, but there are also many other code checkers. In the future I’m planning to use pylint to check all my code and make sure it conforms to PEP8 – hopefully meaning my code will be of a higher quality!
Once you’ve fixed the problems in your code, you can re-commit and push to github:
git add .
git commit -m "fix "
git push
Step 5. Find a real person to approve!
Once you’re code passes all the checks its time to wait until someone on the project approves and merges your pull request. The people in the Anisble community were pretty helpful to me as a first timer and gave me some tips. The first pull request was for a bug fix in another module, which has been approved – but I’m still waiting for my new module to get checked out.
Leave a Reply