
As part of this series on creating and deploying a full stack web app, I’m using the Django web framework. Django has pre-designed parts for you compared to Flask which I’ve used previously. That saves some development time, although it is a bit harder to understand initial as many things are implicit or defined in different ways. One great thing is that it has an admin backend up and running straight away, so you can edit any data on the backend directly without needing to create the views or edit the database manually.
PART 1: Deployment Choices
PART 2: Setting Up Django Cheat Sheet
PART 3: Deployment using Ansible and Pyenv (this post)
PART 4: Alternative deployment with Docker (future post)
This article will demonstrate the steps to reliably and repeatably deploy a Django app in production using Ansible, which is a tool for automating server and infrastructure deployment.
Introduction
Django is easy to run locally for development, however for production use you need to deploy to a VPS and serve using production level server software rather than the built in Django development server.
This article describes how to automate this setup with Ansible, using common options of Ubuntu, Ningx (the web server), uWSGI (a bridge between python and the web server), and SQLite for the database. This article assume the local machine on which Ansible is running is MacOS, so Linux and Windows users may need to make some minor modifications.
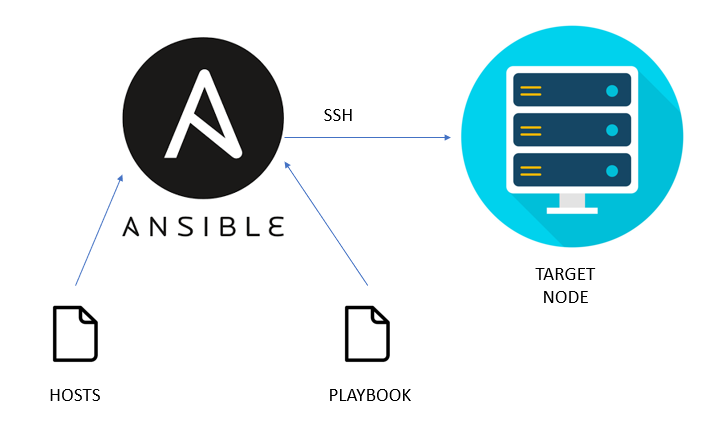
Ansible is a python based automation tool which allows repeatable automation of server tasks. This means once this is configured as per this article, the same Ansible playbook can be used to deploy other Django projects (with minor modifications as required). Furthermore, any changes to the project can be reliably made by running the Ansible playbook again.
Prerequisites
Before getting started, ensure that a Django project is available and working locally, and upload it to a Github repository – example here. Creating a Django project is outside the scope of this article, but you will need do at least the following things for a basic setup:
- Create a Django project: `django-admin startproject example-project-name`
- Create a Django app within the project: `python manage.py startapp example-app-name`
- Add details to your apps settings.py file, especially adding your domain name to ALLOWED_HOSTS, add a .env file with any passwords etc,
- Setup db.sqlite3 as the database, create your models, views, templates and application logic.
- Collect static files into a your django project folder: `python manage.py collectstatic`
- Make migrations to apply your models to the database `python manage.py makemigrations`
- Optionally you can create a superuser to login to your admin backend: `python manage.py createsuperuser`
- Start the Django development server to check the project works locally: `python manage.py runserver`
Step 1. Installing Ansible on your local machine
Install Ansible on your local machine (assuming you have python installed):.
mkdir ansible-roles
cd ansible-roles
python3 -m venv env
source env/bin/activate
pip3 install ansible
Ansible performs actions on a remote server over an SSH connection. SSH access is most secure if you use SSH keys rather than a password. Let’s first generate a public and private key pair:
mkdir ssh_keys
ssh-keygen -t rsa -b 2048 -f ./my_ssh_key
In the ssh_keys directory there will now be two files, `ssh_keys` and `ssh_keys.pub`. `ssh_keys` is your private key file and should be kept safe. You can now open the `ssh_keys.pub`, which contains the public key.
This article assumes the public key is named `my_ssh_key.pub` and private key is name `my_ssh_key` and both are available in the ssh_keys directory. For Django apps residing in a private Github repo, the best practice with regards to security is to forward this SSH key to the remote server from your local machine, since storing a Github password or SSH key on the server is a risk. To do this, create another SSH key pair. Paste the public key (another_SSH_key.pub) into Github: Repository > Settings > SSH and GPG keys > New SSH key (Note that each Github repo requires a unique SSH key).
Configure Ansible to forward SSH keys, by creating `ansible.cfg` with the following:
[defaults]
host_key_checking = False
[ssh_connection]
ssh_args = -o ForwardAgent=yes
Ensure the matching private key is accessible on your local machine (for example by adding it to ssh-agent).
Step 2. Deploy virtual server
Sign up for an account at a VPS provider such as AWS, Vultr, Digital Ocean etc and deploy a new Ubuntu server (these instructions assume Ubunut 22), ensuring you upload and select your SSH key.
Once the server has finished deploying, copy the IP address. Change your DNS ‘A’ record to point to this IP address.
Step 3. Create Ansible Roles, Directory Structure and Variables
Ansible’s automation files are called ‘roles’. Setup the directory structure (inside the ansible-roles directory created in step 1), for this project:
    ansible-roles
    ├── roles
    │   ├── common
    │   │   ├── handlers
    │   │   │   └── main.yml
    │   │   └── tasks
    │   │       ├── main.yml
    │   │       ├── ubuntu.yml
    │   │       ├── ufw.yml
    │   │       └── users.yml
    │   └── djangoapp
    │       ├── tasks
    │       │   ├── buildessentials.yml
    │       │   ├── django.yml
    │       │   ├── main.yml
    │       │   ├── python.yml
    │       │   └── server.yml
    │       └── templates
    │           ├── nginx.j2
    │           ├── uwsgi.j2
    │           └── uwsgi.service.j2
    ├── ssh_keys
    │   ├── ssh_key
    │   └── ssh_key.pub
    ├── ansible.cfg
    └── deploy-django.yml
Edit the `deploy-django.yml` file to contain the following, which is the playbook entry point:
- name: apply common configuration to server
hosts: all
become: true
user: root
environment:
PATH: "{{ ansible_env.PATH }}:/root/.pyenv/bin"
roles:
- common
- djangoapp
Edit the `/group_vars/all` file to contain the following. These variables tell Ansible all of your project specific settings. Do not add this file to source control as it contains passwords and project specific settings.
ssh_dir: ./ssh_keys
DOMAIN_NAME: example.com
GIT_REPO: git@github.com:example_github_username/example_repo_name.git
GIT_BRANCH: main
PROJECT_NAME: example-project-name
MODULE_NAME: example-project-name
APP_NAME: example-app-name
LOCAL_APP_DIR: ~/example-repo
NGINX_CONF_DIR: /etc/nginx/sites-enabled/
NGINX_SITES_DIR: /etc/nginx/sites-available/
PYTHON_VERSION: 3.11.5
Edit the `common/handlers/main.yml` file to contain the following, so the SSH server service can be restarted when required:
  - name: restart SSHd
    service: name=SSH state=restarted
Step 4. Create Ansible tasks for basic server setup
Ansible automation is easier to manage if we break it down into roles tasks. Let’s create files for each of our tasks in the common role, which could be used for setting up any server:
cd roles/common/tasks
touch hosts main.yml users.yml ufw.yml ubuntu.yml
You could add all Ansible tasks to one file, however for clarity and reusability, it’s better to separate out into different sections, and reference these from the main entry point for the common role, `common/tasks/main.yml`. Add the following to this file:
- include: ubuntu.yml
- include: users.yml
- include: ufw.yml
In `common/handlers/ubuntu.yml` add the following commands. This updates the system with the latest packages, sets the timezone and add installs the security package fail2ban:
  - name: Update and upgrade apt packages
  apt:
      upgrade: yes
      update_cache: yes
      cache_valid_time: 86400 # 1 day

  - name: Set timezone to Europe/London
  timezone:
      name: Europe/London

  - name: Install basic server packages
  apt: name={{item}}
  become: true
  with_items:
      - fail2ban
      - ntp
For security, you can remove password access via SSH and force the use of SSH keys which is more secure. Although we won’t login using a password, to enable root login the root user does require a password. In `users.yml` add the following:
  - name: Change root password
    user: name=root password={{ ROOT_PASSWORD | password_hash('sha512') }} update_password=always

  - name: Disable SSH password login
    lineinfile: dest=/etc/SSH/SSHd_config regexp="^#?PasswordAuthentication" line="PasswordAuthentication no"
    notify: restart SSHd
Setup the Uncomplicated Firewall to allow SSH access on port 22 (for command line / Ansible access), web access on port 80 and secure web access on port 443 (for your Django app). To do this, edit the `ufw.yml` file to contain:
  - name: Set default firewall policy to deny all
    ufw: direction=incoming policy=deny
  - name: enable SSH in firewall
    ufw: rule=allow port=22
  - name: enable HTTP connections for web server
    ufw: rule=allow port=80
  - name: enable HTTPS connections for web server
    ufw: rule=allow port=443
  - name: enable firewall
    ufw: state=enabled
Step 5. Create Ansible tasks to install required server packages
Create `djangoapp/tasks/buildessentials.yml` and add a the following, which installs nginx nload, and certbot for the webserver, and a list of packages that we need to build python and install pacakges from source.
  - name: Install webserver
    apt:
      name:
        - nginx
        - nload
        - certbot
        - python3-certbot-nginx
      state: present

  - name: Install build-essential
    apt:
      name:
        - build-essential
        - llvm
        - libssl-dev
        - zlib1g-dev
        - libbz2-dev
        - libreadline-dev
        - libsqlite3-dev
        - curl
        - libncursesw5-dev
        - xz-utils
        - tk-dev
        - libxml2-dev
        - libxmlsec1-dev
        - libffi-dev
        - liblzma-dev
        - git
        - make
        - libpcre3-dev
        - libz-dev
      state: present
Step 6. Create Ansible tasks to install Python using pyenv
For production deployments being able to control the version of Python and a virtual environment with the required packages is important. This article shows how to do this with Pyenv. Pyenv works by modifying the shell with shims to access the correct version and virtual environment. One downside of this is that Ansible commands such as pip will not work for this case and they must be run using ‘command’ or ‘shell’ instead. An alternative approach would be to use Docker to manage the python environment and webserver, but that is outside the scope of this article.
Create an Ansible task in `djangoapp/tasks/python.yml` to install pyenv, and install the version of Python you require.
  - name: Install pyenv using curl
    shell: "curl -s https://pyenv.run | bash"
    args:
      creates: "/root/.pyenv/README.md"

  - name: Update .bashrc file for pyenv
    lineinfile:
      path: "/root/.bashrc"
      line: "{{ item }}"
      create: yes
    loop:
      - 'export PYENV_ROOT="/root/.pyenv"'
      - 'export PATH="$PYENV_ROOT/bin:$PATH"'
      - 'eval "$(pyenv init -)"'
      - 'eval "$(pyenv virtualenv-init -)"'

  - name: Update pyenv
    shell: "pyenv update"

  - name: Install Python {{ PYTHON_VERSION }} with pyenv
    shell: "pyenv install {{ PYTHON_VERSION }}"
    args:
      creates: "/root/.pyenv/versions/{{ PYTHON_VERSION }}"
Step 7. Create Ansible tasks to clone the Django app repo and install the python virtual environment
Now our Github repo is accessible and Pyenv is installed, add a task to clone (or pull if it exists) the repo. It’s likely you will have files on your local machine and not in source control (such as a .env file for environment variables containing API keys etc), and these can be copied directly. To do this, in `djangoapp/tasks/django.yml` add:
  - name: Clone a private repository into {{PROJECT_NAME}} folder.
    git:
      repo: "{{ GIT_REPO }}"
      version: "{{ GIT_BRANCH }}"
      dest: "/home/{{ PROJECT_NAME }}"
      accept_hostkey: yes
      update: yes

  - name: Copy .env file to server
    become: true
    copy:
      src: "{{LOCAL_APP_DIR}}/.env"
      dest: "/home/{{ PROJECT_NAME }}/.env"
Django apps have various required python packages. It is assumed that these are available in `requirements.txt` in the repo just cloned. To create a python virtualenv with Pyenv and install the requirements, add these new tasks to `djangoapp/tasks/django.yml`:
  - name: Create a Python virtual environment
    ansible.builtin.command: "pyenv virtualenv {{ PYTHON_VERSION }} {{ PROJECT_NAME }}"
    args:
      creates: "/root/.pyenv/versions/{{ PYTHON_VERSION }}/envs/{{ PROJECT_NAME }}"

  - name: Add pip, setuptools, uWSGI in the virtual environment
    ansible.builtin.command: "/root/.pyenv/versions/{{ PYTHON_VERSION }}/envs/{{ PROJECT_NAME }}/bin/python -m pip install {{ item }}"
    with_items:
      - pip
      - setuptools
      - uwsgi

  - name: Read requirements.txt line by line
    ansible.builtin.shell: cat /home/{{ PROJECT_NAME }}/requirements.txt
    register: requirements_contents
    changed_when: false

  - name: Install packages one by one
    ansible.builtin.command: "/root/.pyenv/versions/{{ PYTHON_VERSION }}/envs/{{ PROJECT_NAME }}/bin/python -m pip install {{ item }}"
    loop: "{{ requirements_contents.stdout_lines }}"
    when: requirements_contents.stdout_lines is defined

  - name: create project log directory
    file: "path=/home/{{PROJECT_NAME}}/logs state=directory"
The following tasks at the end of `djangoapp/tasks/django.yml` assume that Django uses an sqlite database named ‘db.sqlite3’, and that this has been setup and tested locally. On the first run of the playbook the database will be copied, and on subsequent runs only the migrations will be applied.
  - name: Check if the Django SQLite DB file exists on the remote host
    ansible.builtin.stat:
      path: "/home/{{ PROJECT_NAME }}/db.sqlite3"
    register: db_file

  - name: Copy Django SQLite DB file from localhost if it doesn't exist on the remote host
    ansible.builtin.copy:
      src: "{{LOCAL_APP_DIR}}/db.sqlite3"
      dest: "/home/{{ PROJECT_NAME }}/db.sqlite3"
    when: not db_file.stat.exists

  - name: Apply DB migrations
    ansible.builtin.command: "/root/.pyenv/versions/{{ PYTHON_VERSION }}/envs/{{ PROJECT_NAME }}/bin/python /home/{{ PROJECT_NAME }}/manage.py migrate"
Step 8. Create Ansible tasks to configure the server and setup SSL certificate
On your local machine, you can test your Django app using the built-in development server (`python manage.py runserver`). For production, the recommended options are to use Nginx and uWSGI to server the Django app. These both need configuration files. Ansible also comes with the templating engine Jinja, so a generic template can be created and project specific variables pulled in from `group_vars/all`.
Create a template `roles/django/templates/nginx.j2` for the Nginx configuration as below. SSL information is not required since this will be managed automatically by cerbot.
    upstream {{PROJECT_NAME}} {
        server unix:///home/{{PROJECT_NAME}}/{{PROJECT_NAME}}.sock;
    }

    server {
        listen       80;
        server_name  {{ DOMAIN_NAME }};
        charset     utf-8;
        client_max_body_size 75M;
        access_log /var/log/nginx/access.log;
        error_log /var/log/nginx/error.log;

        location / {
            uwsgi_pass  {{PROJECT_NAME}};
            include     uwsgi_params;
        }

        location /static {
            alias /home/{{PROJECT_NAME}}/{{ APP_NAME }}/static;
            expires 365d;
        }
    }
Create a template `roles/django/templates/uwsgi.j2` for the uWSGI configuration and add:
    [uwsgi]
    home = /root/.pyenv/versions/{{ PYTHON_VERSION }}/envs/{{PROJECT_NAME}}/
    logto = /var/log/uwsgi.log
    module = {{MODULE_NAME}}.wsgi
    master = true
    processes = 4
    socket = /home/{{PROJECT_NAME}}/{{PROJECT_NAME}}.sock
    chmod-socket = 666
    max-requests = 5000
    vacuum = true
Create a template `roles/django/templates/uwsgi.service.j2` for the uWSGI service, and add the following. Unlike Nginx, a service needs to be created specifically for uWSGI:
  [Unit]
  Description=uWSGI Django server instance
  After=syslog.target

  [Service]
  ExecStart=/root/.pyenv/versions/{{ PYTHON_VERSION }}/envs/{{ PROJECT_NAME }}/bin/uwsgi --ini /home/{{PROJECT_NAME}}/{{PROJECT_NAME}}_uwsgi.ini
  WorkingDirectory=/home/{{PROJECT_NAME}}
  Restart=always
  KillSignal=SIGQUIT
  Type=notify
  StandardError=syslog
  NotifyAccess=all

  [Install]
  WantedBy=multi-user.target
Create `roles/djangoapp/server.yml` and add the following Ansible tasks to create config files based on the templates above and the variables supplied in `group_vars/all`:
  - name: create project uWSGI config file based on template
    template:
      src: uwsgi.j2
      dest: "/home/{{PROJECT_NAME}}/{{PROJECT_NAME}}_uwsgi.ini"

  - name: create uWSGI systemd service from template
    template:
      src: uwsgi.service.j2
      dest: "/etc/systemd/system/{{PROJECT_NAME}}_uwsgi.service"

  - name: create Nginx config for project based on template
    template:
      src: nginx.j2
      dest: "{{NGINX_CONF_DIR}}/{{PROJECT_NAME}}.conf"
In order to complete the server setup, link the Nginx configuration from sites-enabled:
  - name: copy nginx conf from sites-available to sites-enabled
    file:
      src: "{{NGINX_CONF_DIR}}/{{PROJECT_NAME}}.conf"
      dest: "{{NGINX_SITES_DIR}}/{{PROJECT_NAME}}.conf"
      state: link
For production web apps, SSL certificates are essential. In step 5 the Let’s Encrypt’s certbot was already installed. Before starting the Nginx server, obtain a certificate and set certbot to renew the certificate every 30 days.
  - name: Setup SSL certificate with Let's Encrypt # adds SSL section to nginx config automatically
    command: "certbot --non-interactive --agree-tos -m {{EMAIL_ADDRESS}} --nginx -d {{DOMAIN_NAME}} -d www.{{DOMAIN_NAME}}"

  - name: Let's encrypt certbot status check
    command: "systemctl status certbot.timer"
    register: systemctl_output

  - name: Let's encrypt certbot status is -
    debug:
      var: systemctl_output.stdout_lines
To complete the setup, add Ansible tasks to reload the systemd configuration – since Nginx and uWSGI services have been updated and enable and start both of these services:
  - name: Reload systemd configuration
    command: systemctl daemon-reload

  - name: Start and enable uWSGI and Nginx systemd services
    service:
      name: "{{ item }}"
      state: restarted
      enabled: yes
    with_items:
      - nginx
      - "{{PROJECT_NAME}}_uwsgi"
Step 9. Run the playbook
To run the Ansible playbook with all the tasks that have been specified, run the following command, using the IP address of your server: `ansible-playbook deploy-djangoapp.yml -i “192.0.2.1,”`
The status of each task will be displayed. After successful completion, open a web browser at the domain to see the Django app working in production.
Debugging Tips
The most likely places to cause issues are:
- SSH keys not being available or forwarded correctly – read my post for more help – Debugging four common SSH key issues
- Django settings.py at /home/{{PROJECT_NAME}}/{{PROJECT_NAME}}/settings.py
- Nginx configuration at /etc/nginx/sites-enabled/{{PROJECT_NAME}}.conf, error log at /var/log/nginx/error.log
- uWSGI configuration at /home/{{PROJECT_NAME}}/{{PROJECT_NAME}}_uwsgi.iniIf you make any changes to the Django or uWSGI configuration files, ensure you restart the uWSGI service to apply the changes: `systemctl restart {{PROJECT_NAME}}_uwsgi.service`.
For changes to the Nginx configuration, restart the Nginx service: `systemctl restart nginx`. To see a list of running services: `systemctl list-units –type=service –state=running`.
Leave a Reply