
Weather Monitoring – Part 1 – with ThingSpeak and Slack
Weather Monitoring – Part 2 – Air Quality sensing with Shinyei PPD42NS
Part 3 – This post
It’s over a 2 years since the last time I worked on my weather monitor – mostly because I misplaced the Pi and sensors when moving house! They turned up after a big clear out – so it’s a good time to finally finish of the project.
Calculating and uploading average AQI
I’d already got the air quality sensor working, but the correct way to record and present the AQI (Air Quality Index), is to provide an average value over the last hour or 24 hours. I’m going to present the 1 hour average to give a reasonably up to date picture of the AQI. To do this we’ll need to measure the instantaneous AQI and take an average of the last hours’ readings. We can implement this as a Python queue, where readings older than one hour are discarded, and the latest reading is added. This will be a FIFO (first in, first out) queue of a fixed length.
Since the python script is run as a cron job we’ll need to save the queue to a file each time so it can be updated again on the next run. A common way to do this is using Python’s pickle module. We’re taking readings every 15 minutes, so we just want set the maxlength=4, and the oldest reading will be popped off end of the queue automatically. This will look roughly like the following:
from collections import deque
import pickle

try:
    with open('aqireadings.q', 'rb') as file:
        q = pickle.load(file) # load q
except IOError as error:
    q = deque(maxlen=4) # create q if no file exists (first run only)

q.append(reading1) # Append latest reading to start of queue
aqi_1hour_average = sum(q)/len(q) # calculate average

# upload this average to thinkspeak IoT platform here
with open('aqireadings.q', 'wb') as file:
    pickle.dump(q, file) # save queue to local file
I’ve updated thingspeak_update.py with this code, which also relies on the air_quality.py. This can still run stand alone if you just want to see the output on screen. Find it all on github.
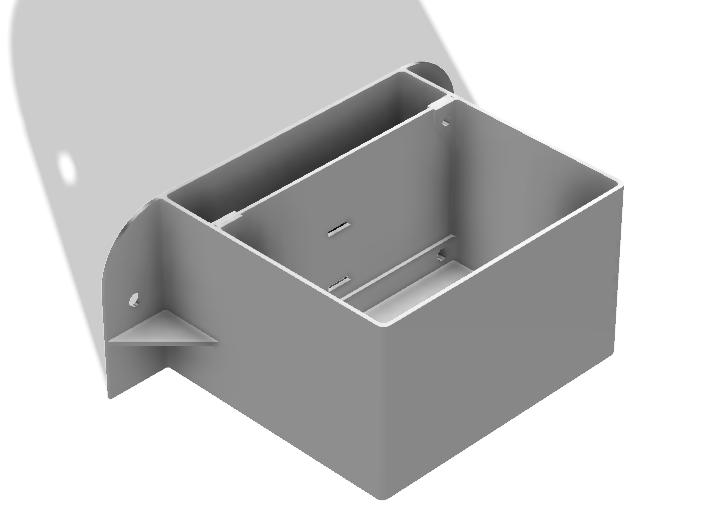
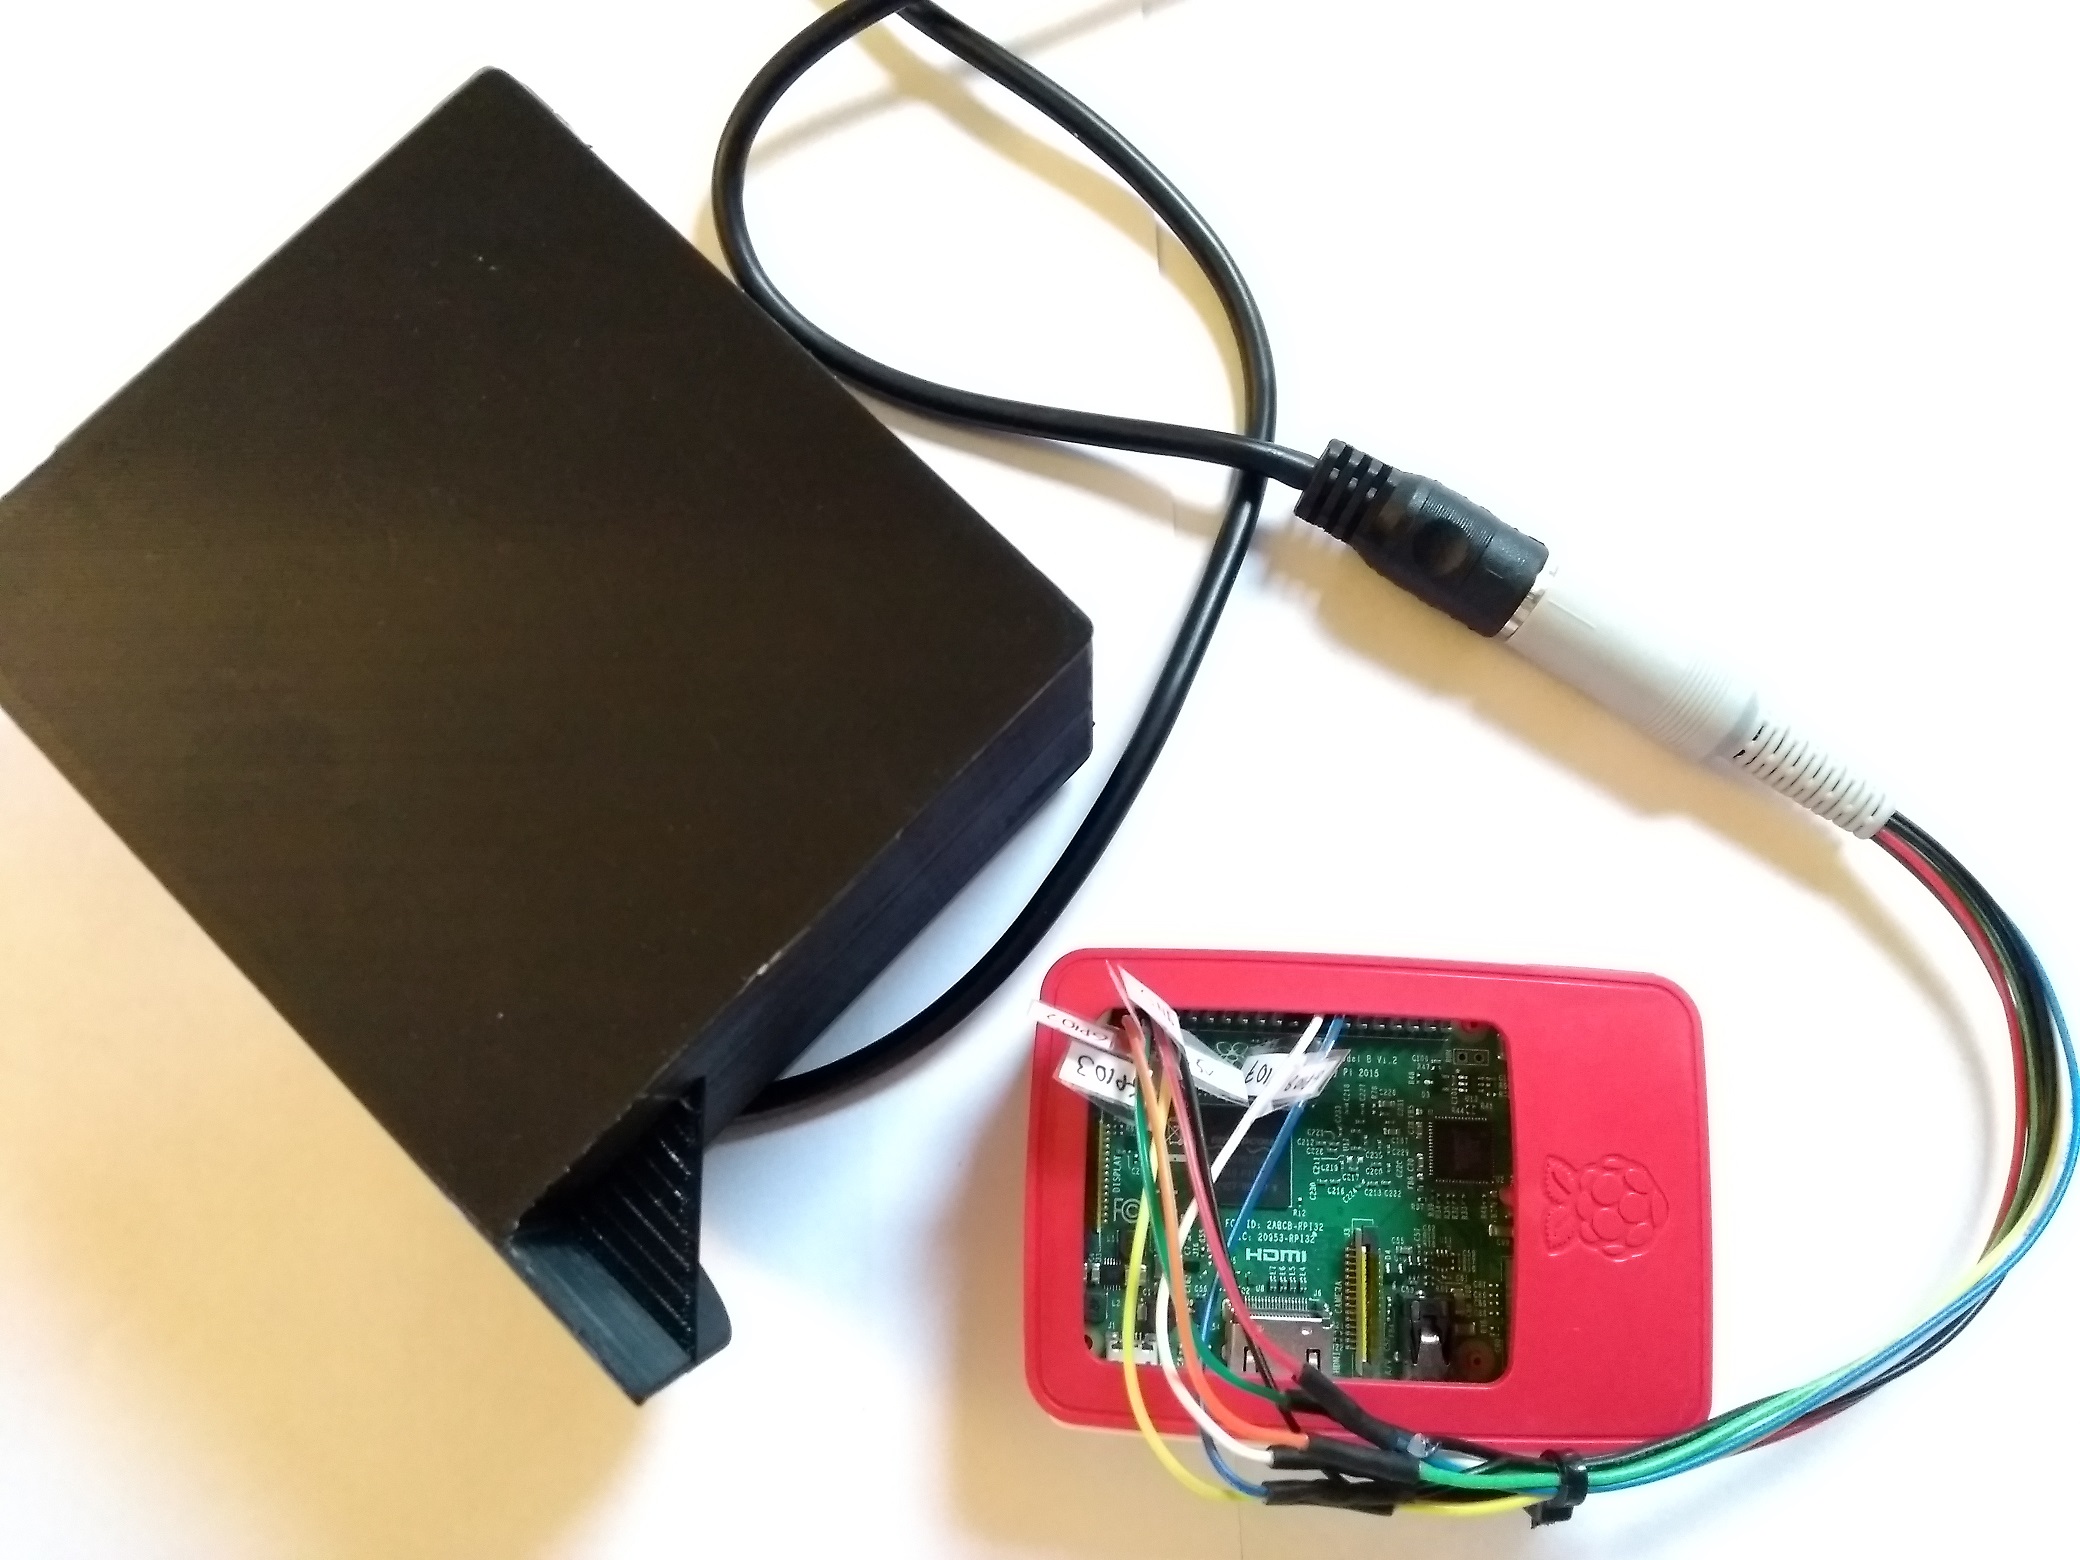
Enclosure and Mounting
I previously mounted the sensors inside an used plastic yoghurt pot, screwed to an outside wall next to a window (so I could run the wires through the window to the Pi). The yogurt pot was open on one side to the elements, which I don’t think was ideal, since the atmospheric pressure sensor was showing signs of oxidization probably due to rain ingress.
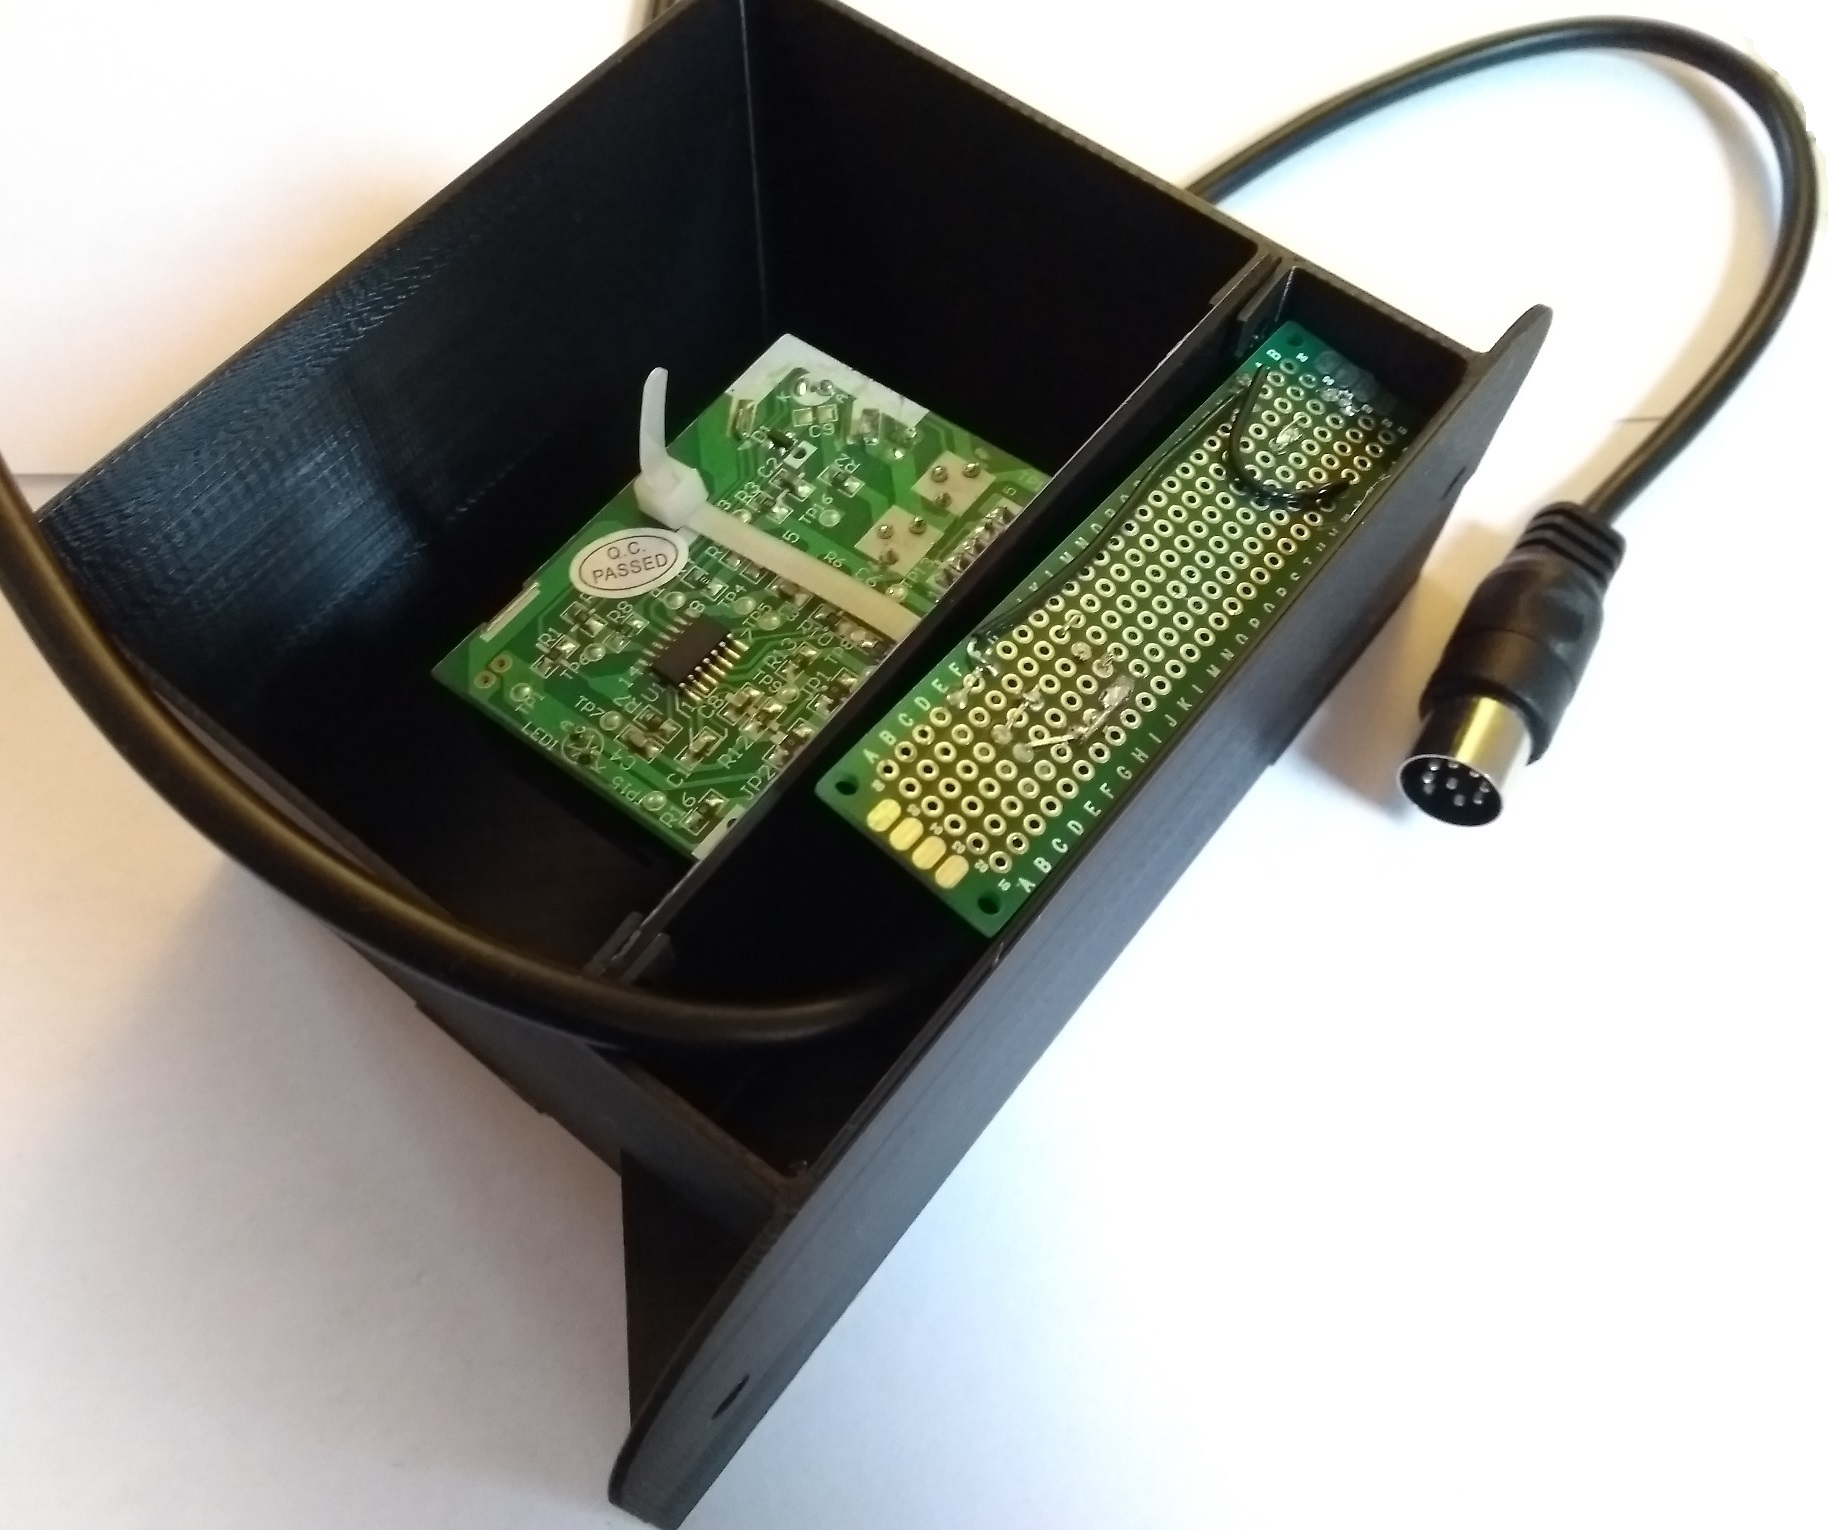
So this time I decided to design and make my own 3D printed enclosure. This will be open at the bottom to allow air to circulate inside but enclosed all around to protect it from rain. The sensors will be mounted on a removable sliding panel to allow them to be more easily attached and removed.
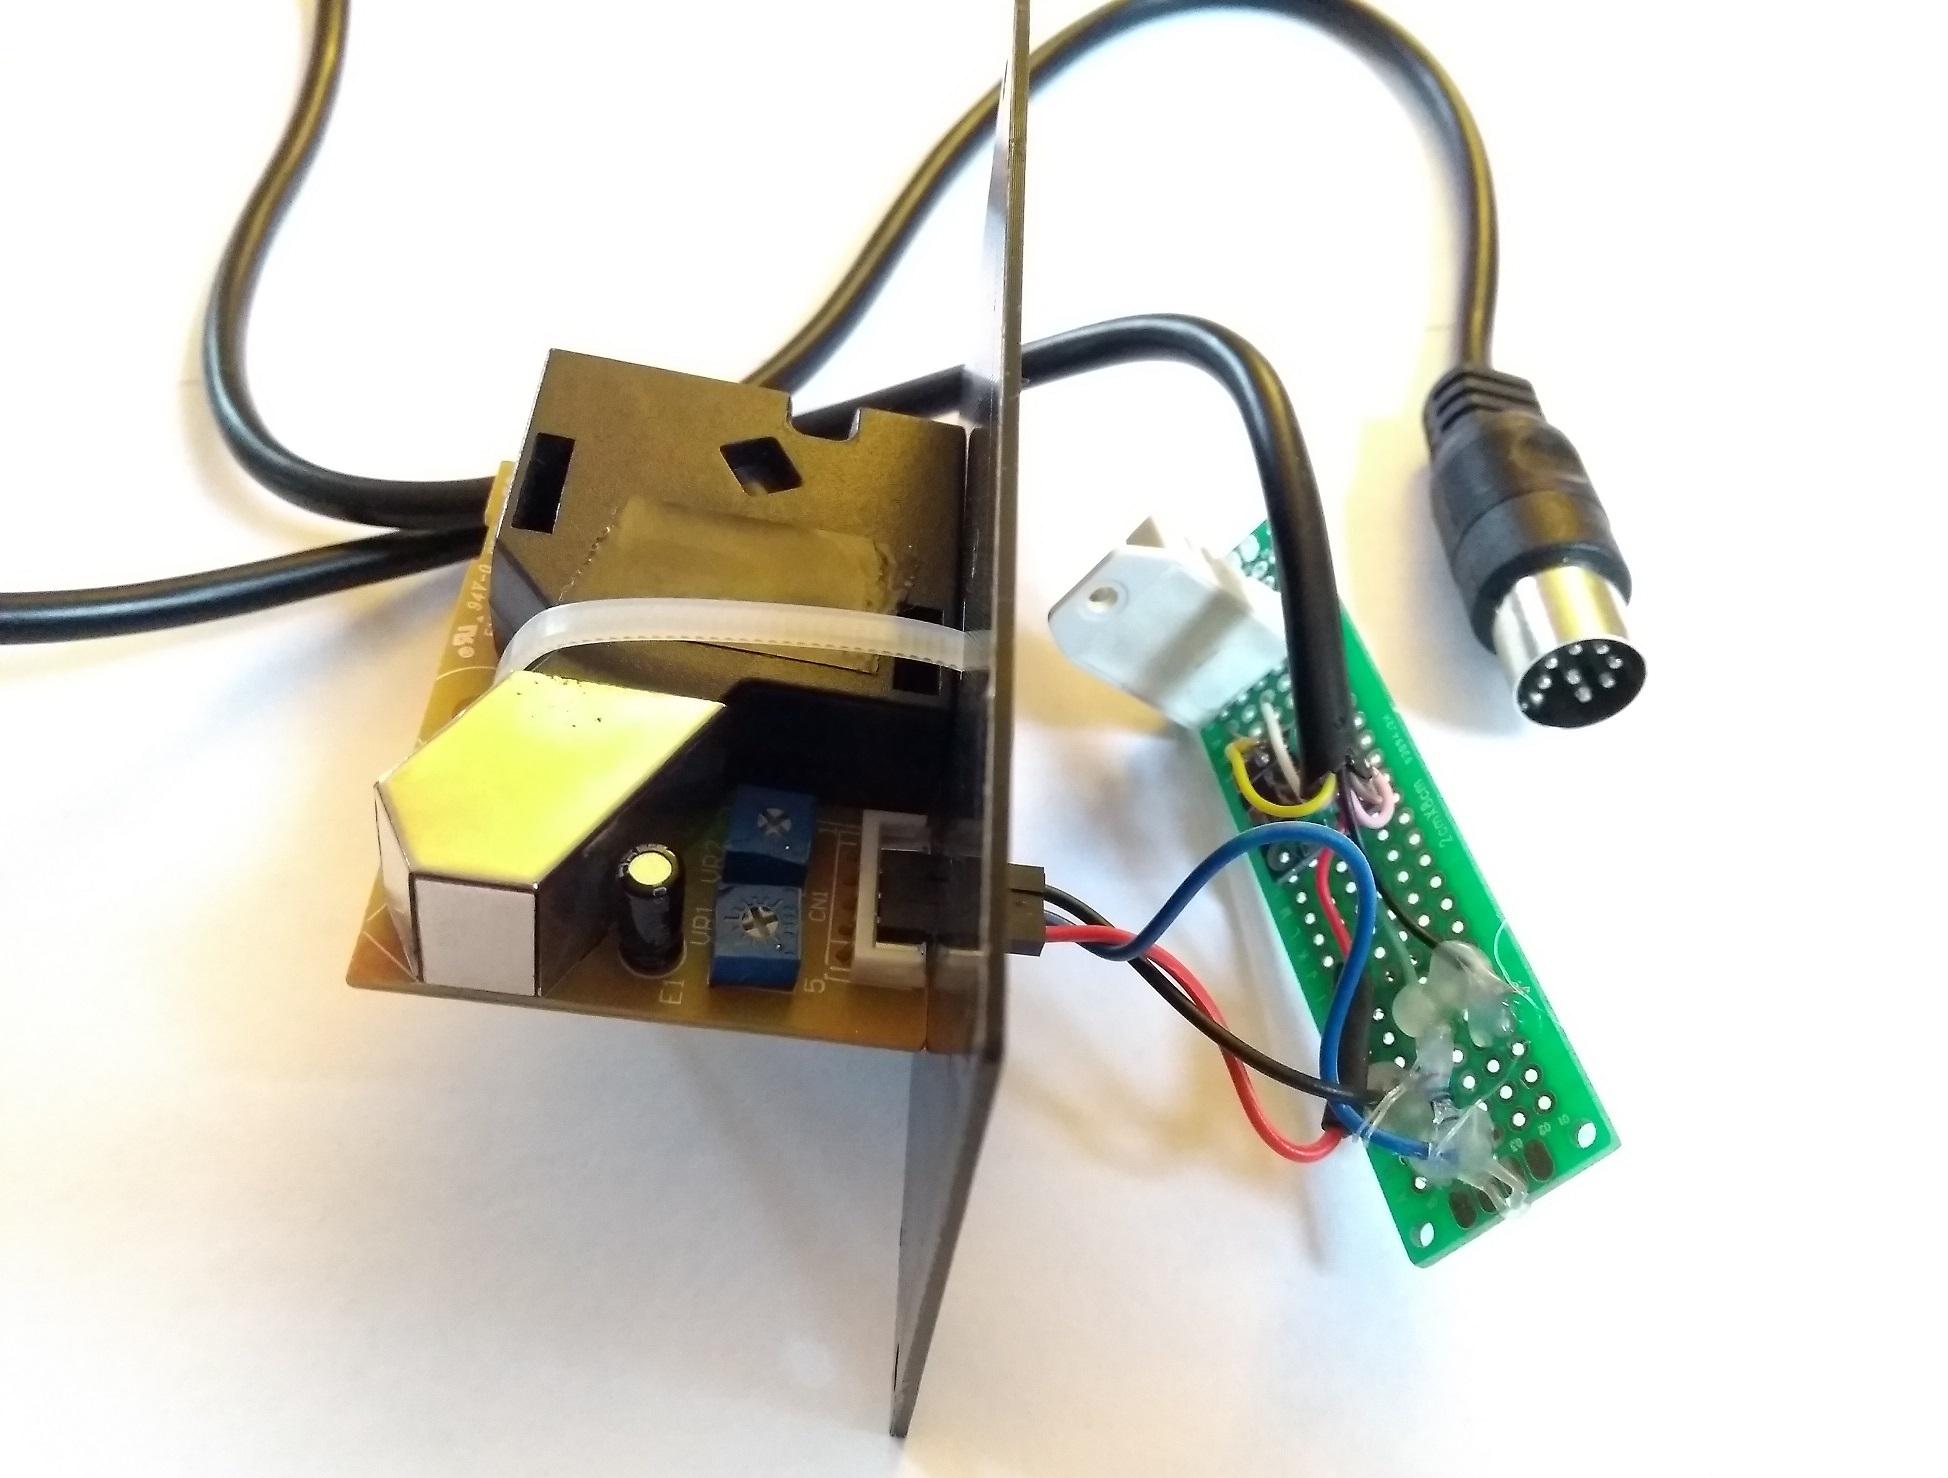
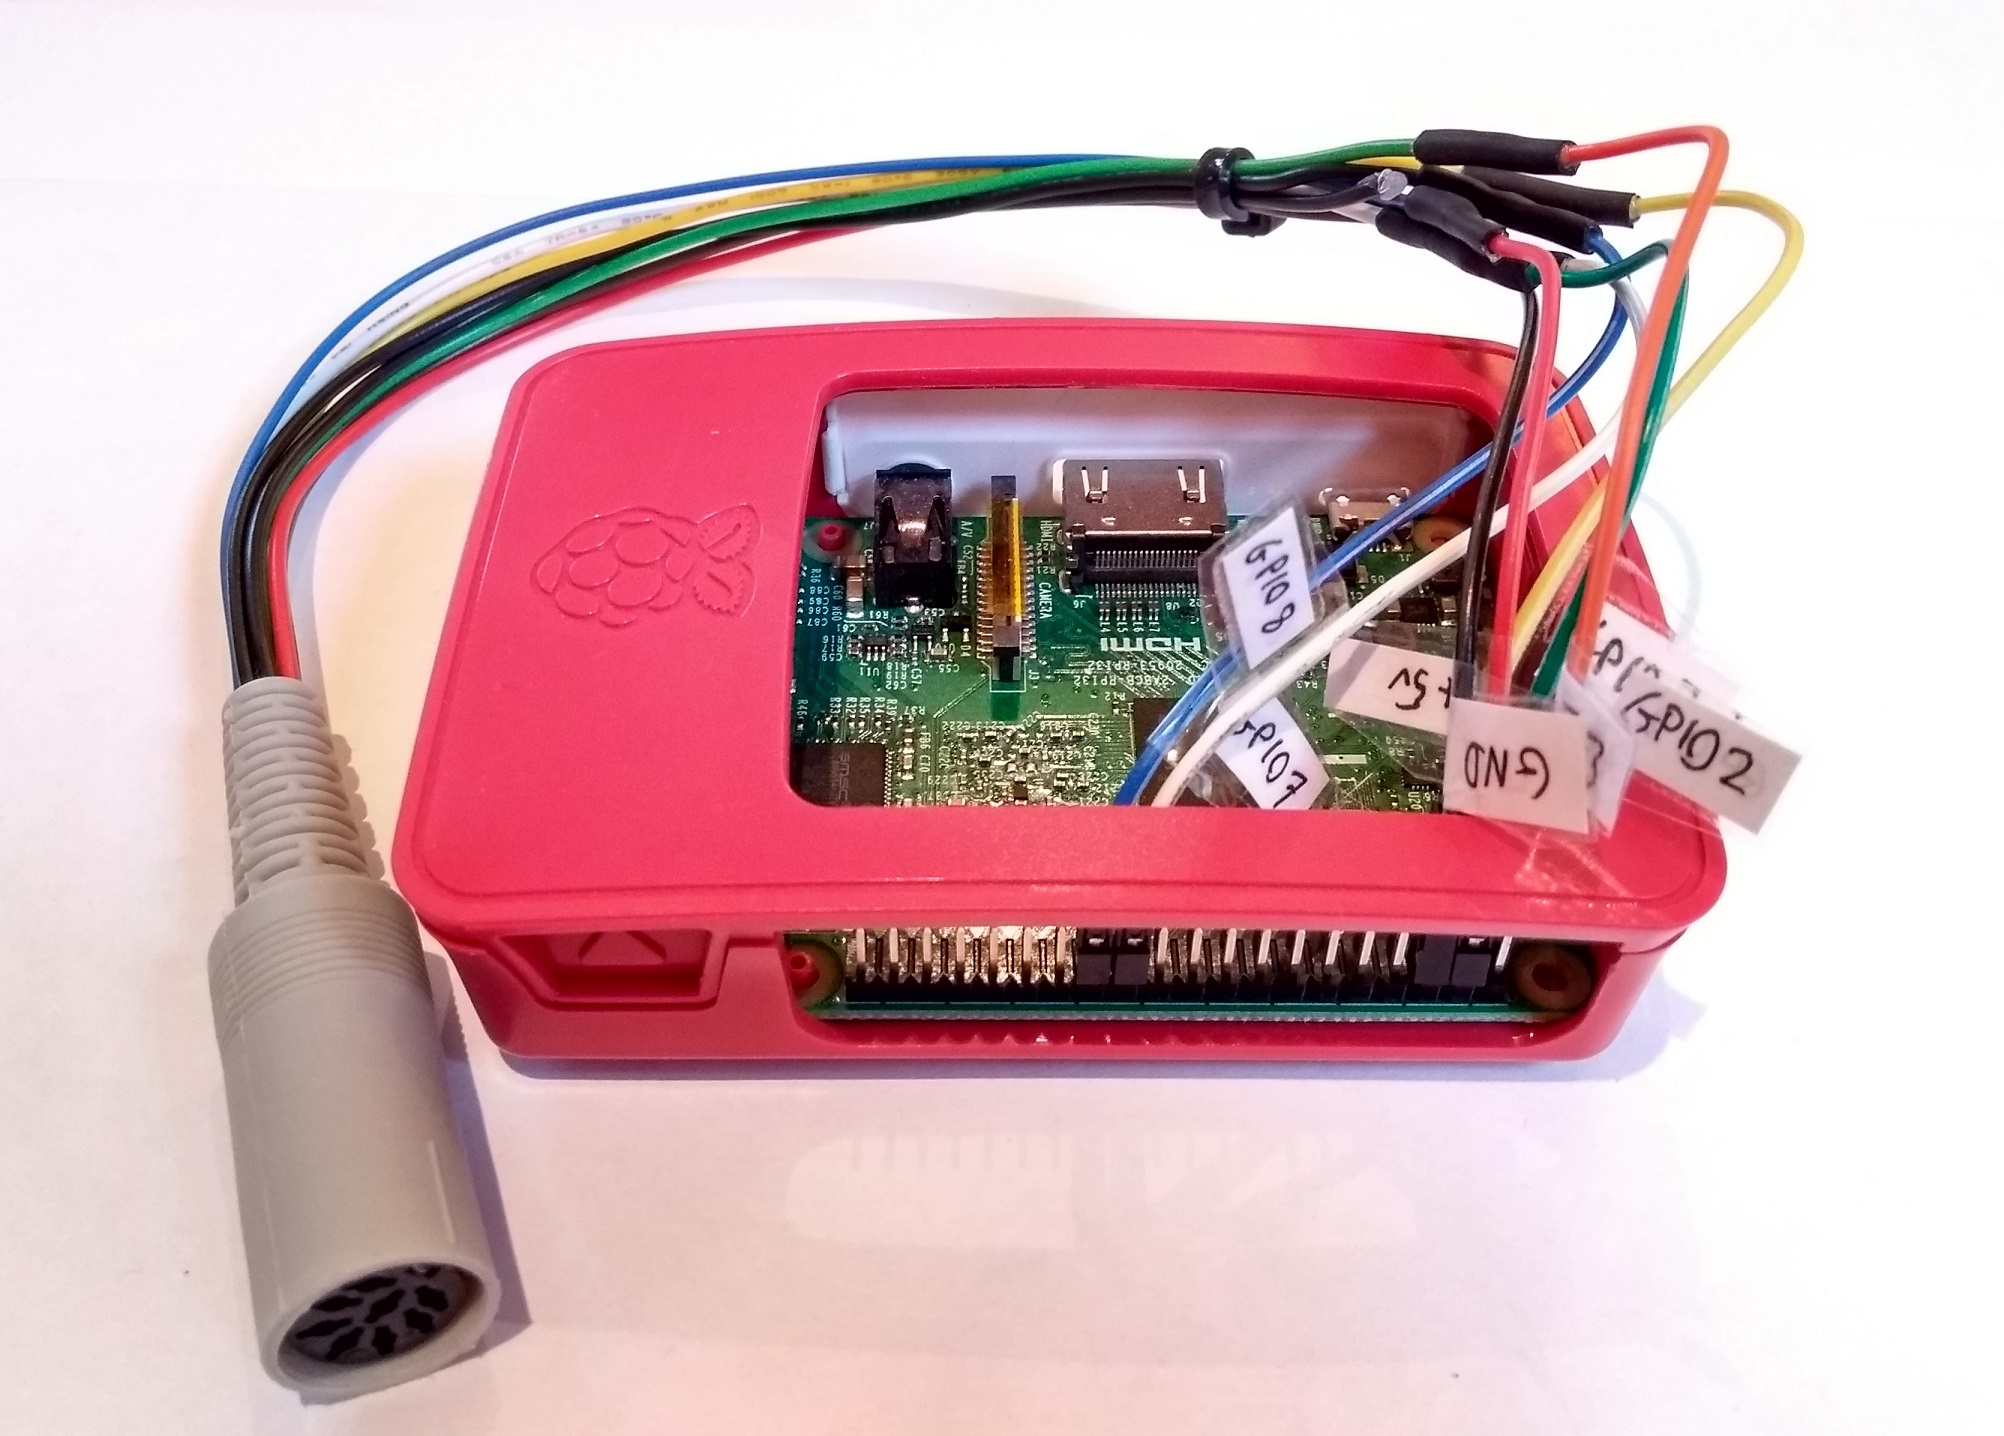
Wiring diagram
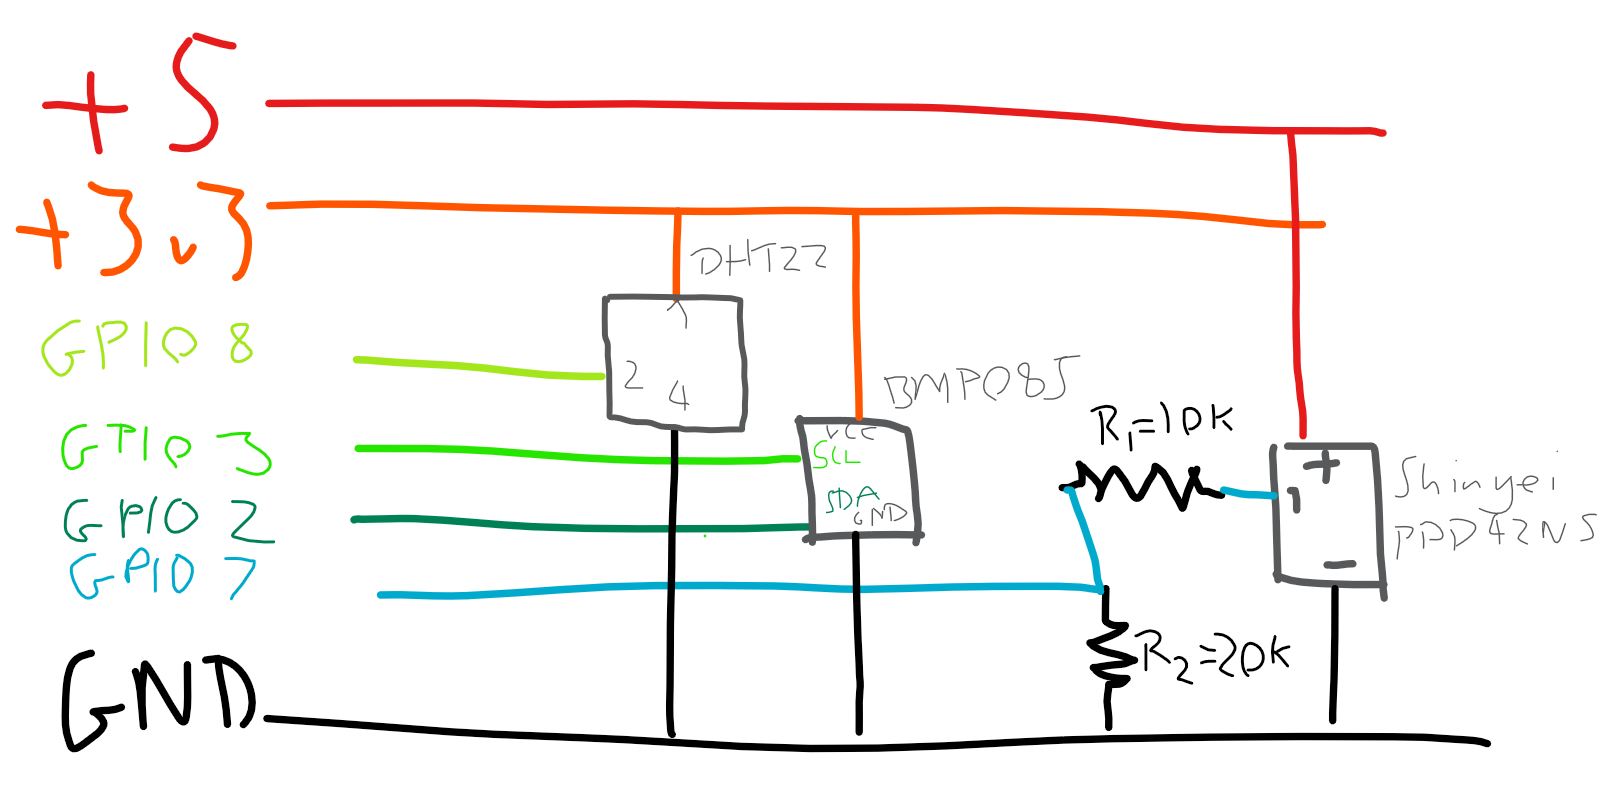
I took the opportunity to make a proper job of the wiring – using an 8 pin mini din cable and connectors so the sensors could be easily disconnected from the Pi. DHT22 and BMP085 sensors were soldered to a breadboard, connected (they can run directly at 3.3v), and added the voltage divider for the air quality sensor which must be powered at 5v (but the data pin output to the Pi must be stepped down to 3.3v).
Data Visualization
Thingspeak comes with its own built in data visualizations, so it’s very easy to embed them online. Here are the graphs for temperature, humidity, atmospheric pressure and AQI:
Leave a Reply